12.3. Tracking Bodies
Note
This site is still work in progress.
12.3.1. Marker Setup
The first tricky step is to decide where to glue the markers on the body to be tracked.
An example for HippoCampus:
Fig. 12.2 Glued on reflective markers. Not depicted are markers on the bottom. A total of 11 markers is used.
Aspects to consider:
Markers should not be mistaken for other markers - do not use symmetrical shapes
At least two cameras need to see a marker. Realistically, the two cameras on one side of the tank will see the same markers. Depending on the motion you are trying to capture, it might be necessary to use quite a few markers.
12.3.2. Defining A Body
A convenient way is to capture some data of the body moving inside the tank. Ideally, the body moves in a way such that all cameras see all markers at some point during the capture.
Label the seen markers, discarding mistakenly identified reflections etc.
…
Add a Mesh
Being able to see a mesh of your robot makes adjusting the body frame’s orientation and translation a lot more intuitive.
Add your mesh as an .obj file in the meshes folder.
Assign the mesh to the 6 DOF Body to be tracked.
For example here:
Edit - Rigid Body - Change Mesh of Rigid Body.
Note that the .obj file does not include scaling. QTM takes the longest length and scales that to 1m.
You can manually scale the mesh until it looks right.
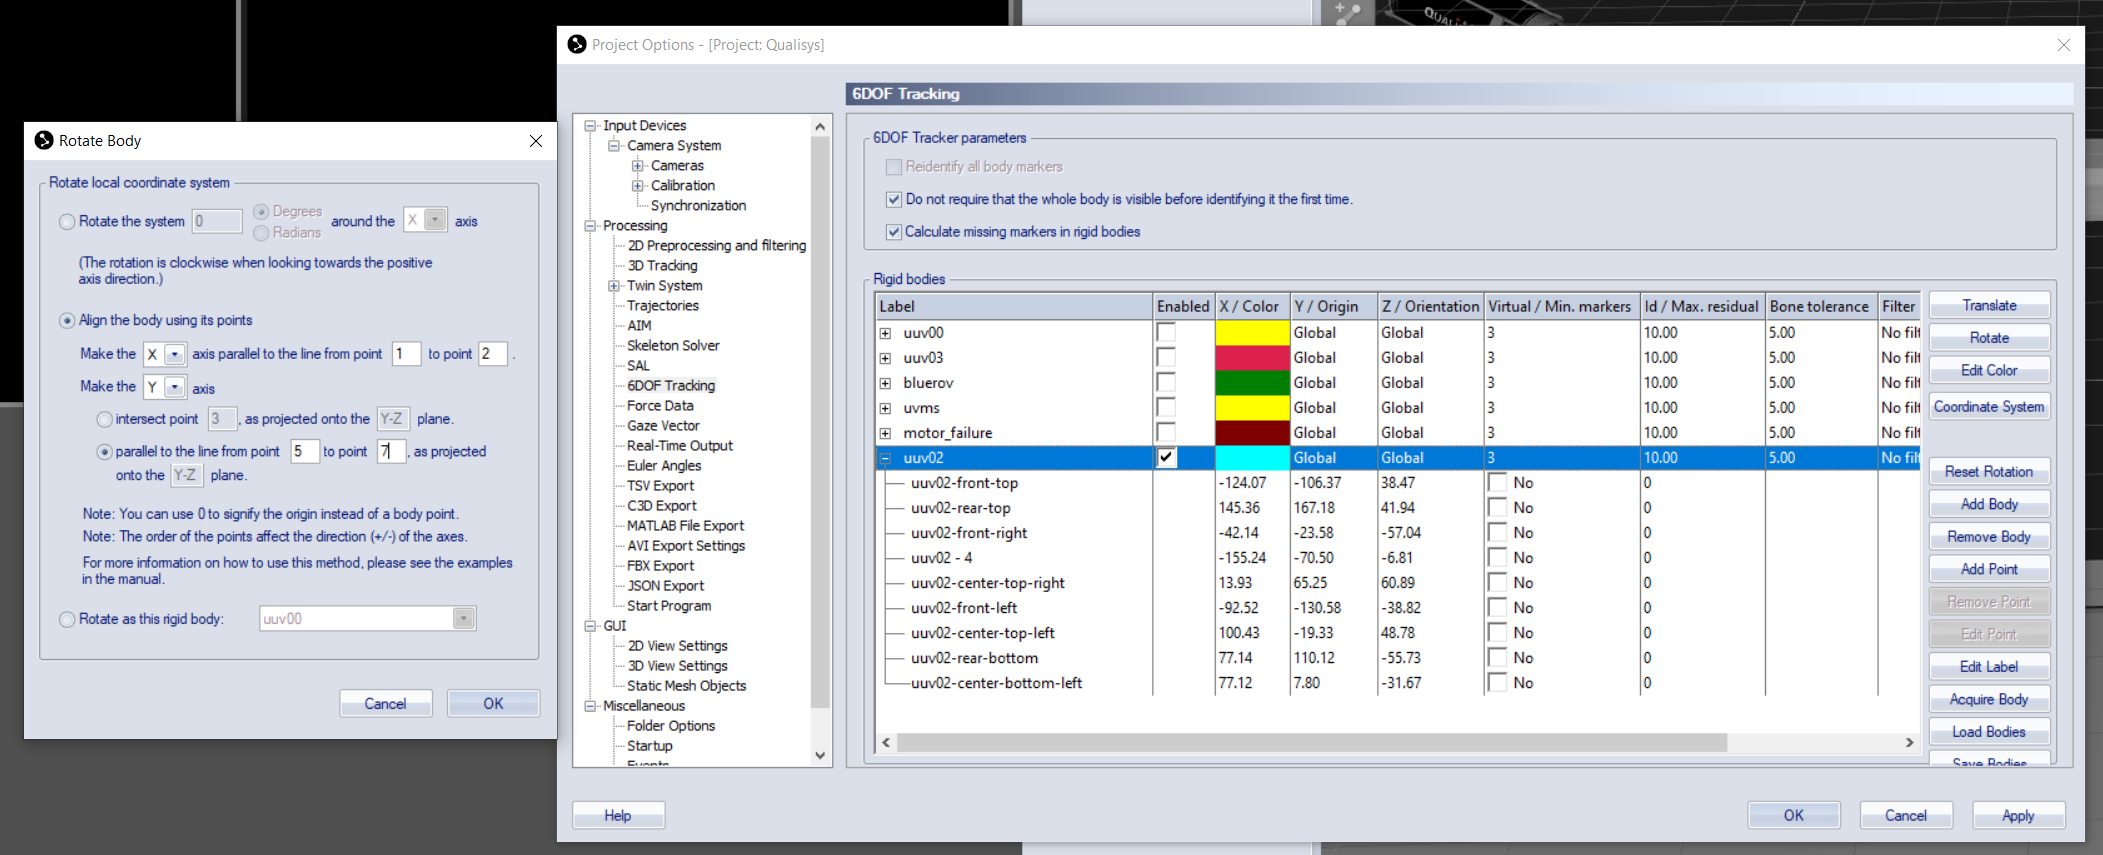
Defining Body Orientation
In 6DOF Tracking, choose Rotate for the body to be tracked.
Ideally, you have positioned your markers so that the x- and y-axis of the body coordinate frame can be chosen between two markers, respectively.

Defining Body Translation
In 6DOF Tracking, choose Translate.
You will have to manually move the origin of the body frame until it looks alright.