12.2. Calibration
In general, the cameras should be calibrated every time they have not been used for a while. If you can be sure that the cameras have not been moved (accidentally), calibration should not be necessary (e.g. resuming experiments on the next day).
12.2.1. L-Frame Orientation & Position
We align the L-Frame with the x- and y-axis of the tank. The long arm axis aligns with the x-axis and the short arm with the y-axis.
It is a good idea to align the L-frame with one of the tags. That way, you can look up the (approximate) position of the tag.
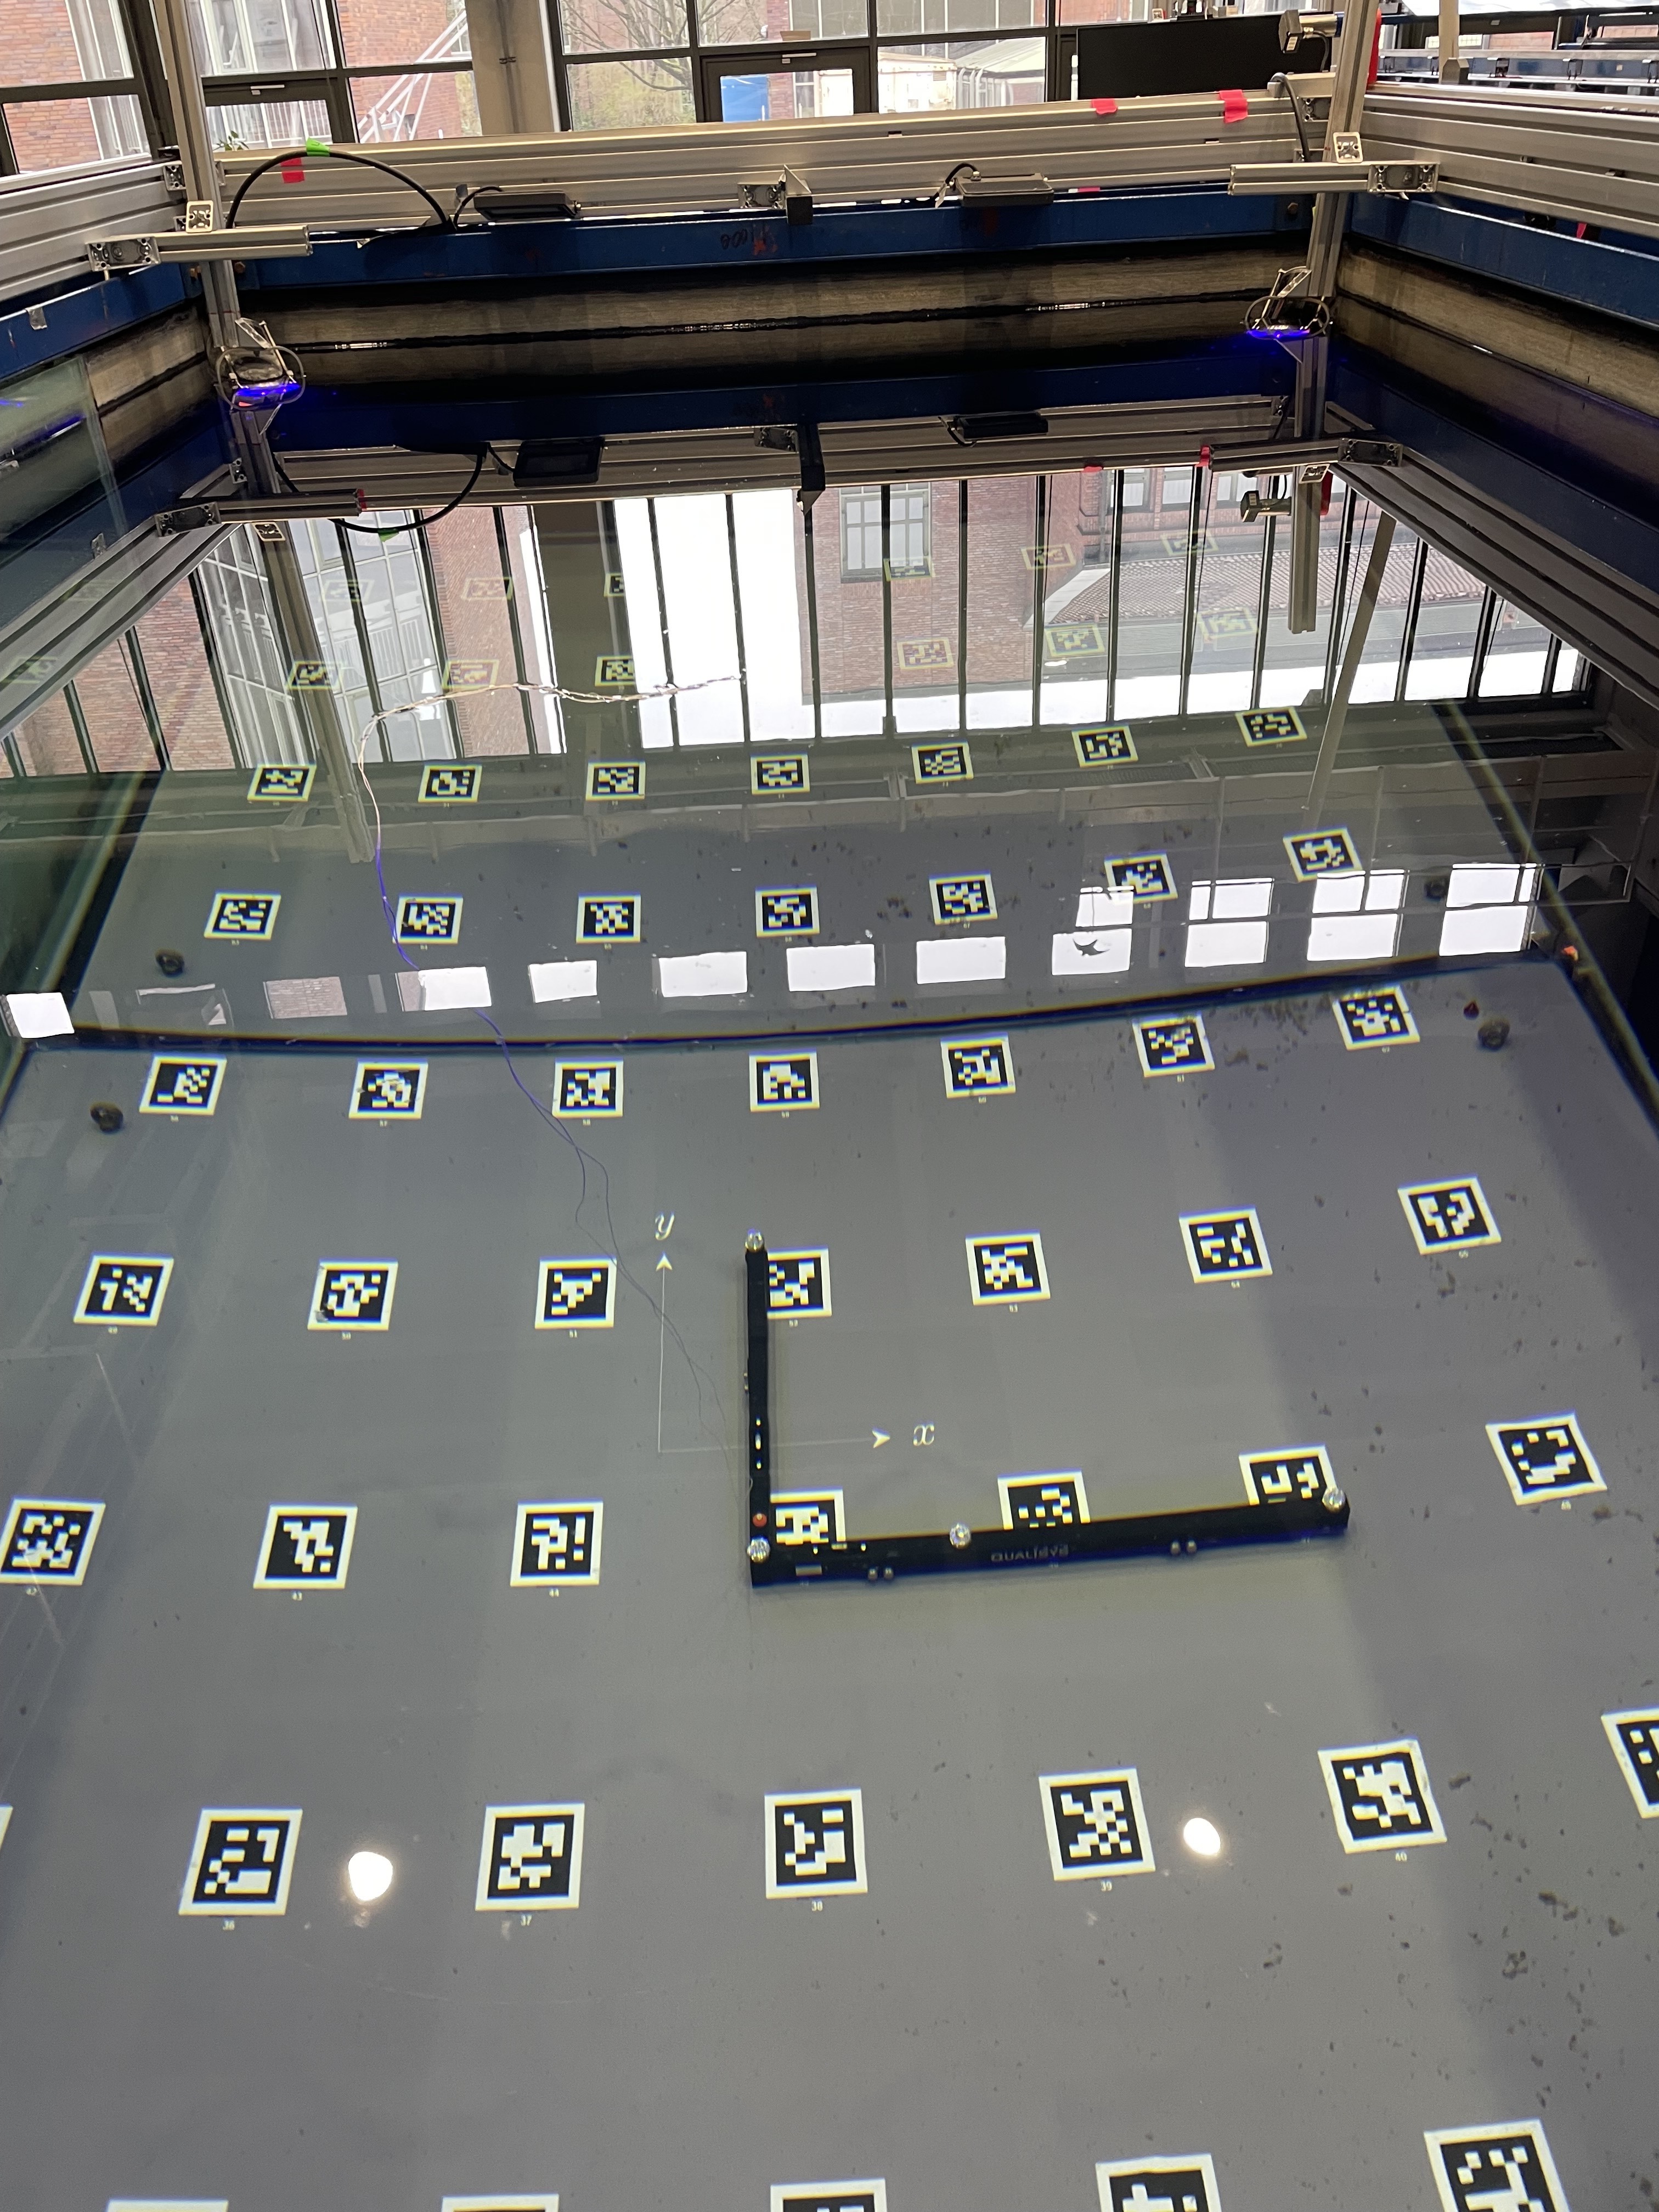
Fig. 12.1 L-Frame position in tank.
12.2.2. Calibration Settings
Setting the orientation
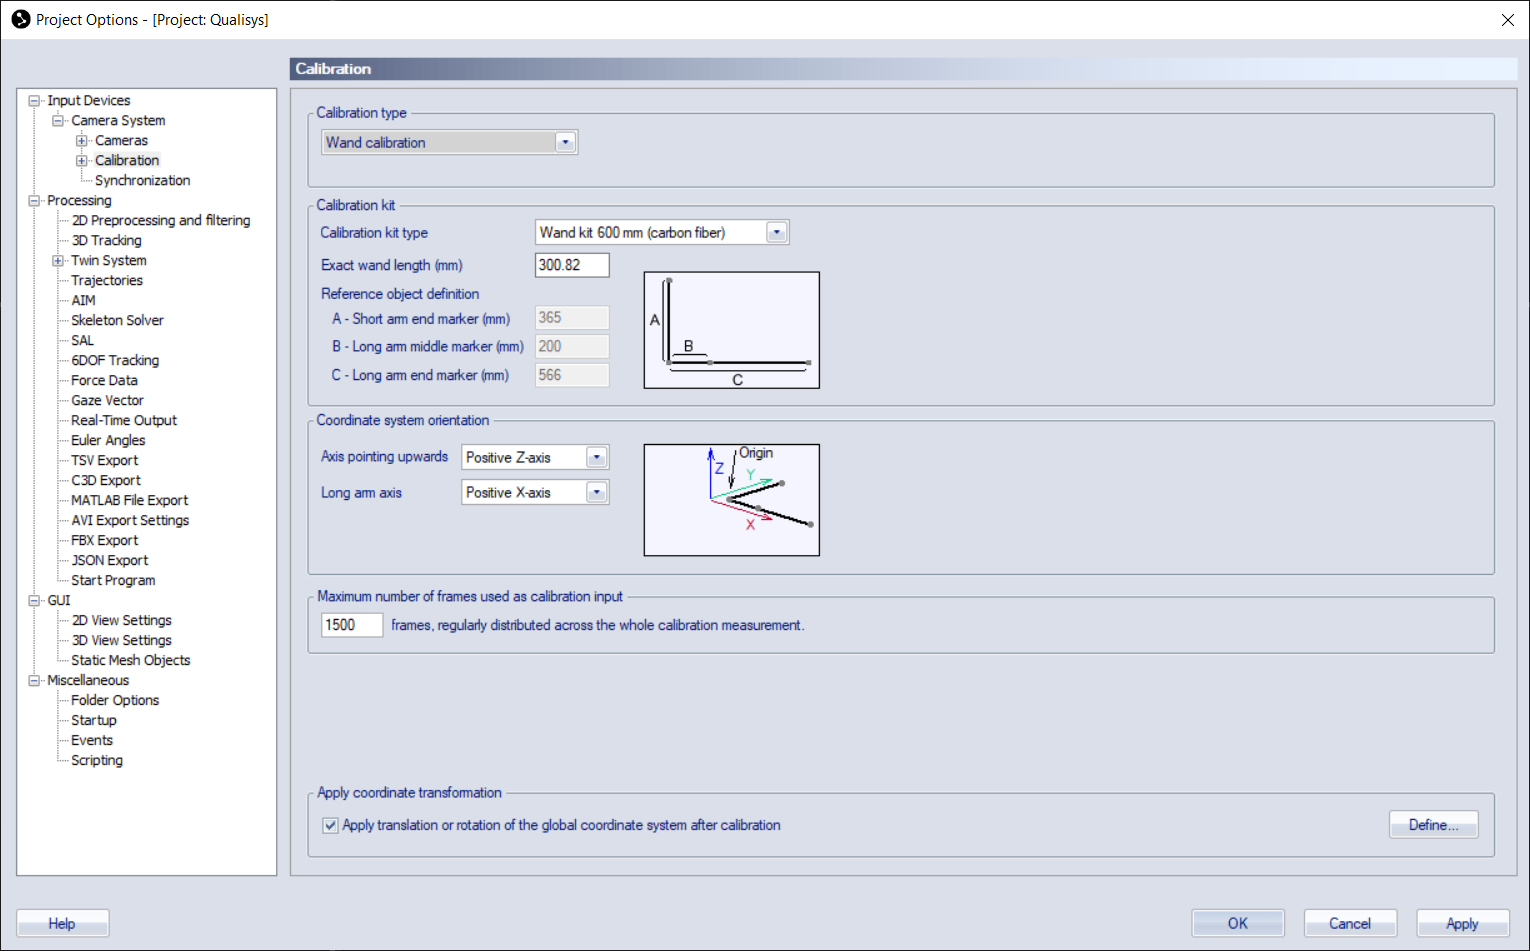
Before you calibrate, you should set the L-Frame orientation. Changing this afterwards is a pain.
In the settings, under Input Devices - Camera System - Calibration, set the coordinate system orientation, set the coordinate frame orientaiton.
Axis pointing upwards: Positive z-axis (should be default)
Long arm axis: positive x-axis
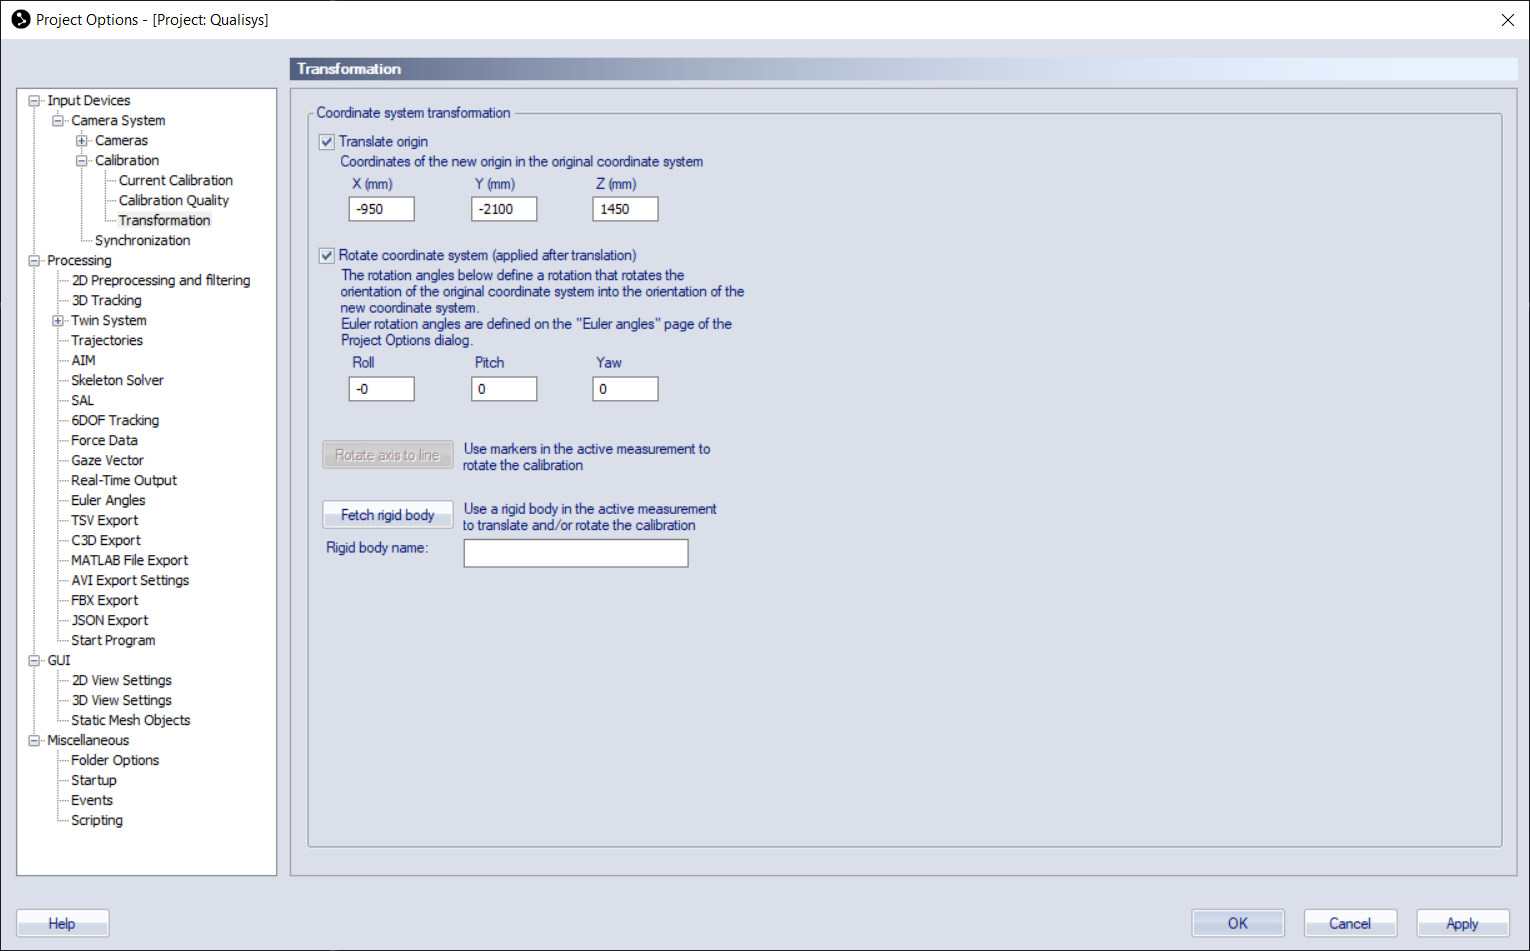
Setting the translation
After you have successfully calibrated, you can translate the origin of the original coordinate system to be aligned with our definition in ROS.
12.2.3. Calibration Results
An average residual under 1mm is desirable.
Attention
Remember to remove the L-Frame from the tank after finishing the calibration. Unfortunately, the markers are not waterproof…