Start The Simulation
Now that we have everything prepared, i.e.:
we can finally start to work with ROS and the Gazebo simulator. The directory structure should look similar to the below displayed one
.
└── fav
    ├── fav
    ├── launch
    │   ├── simulation.launch.py
    │   └── simulation_with_keyboard_control.launch.py
    └── keyboard_control
- simulation.launch.py
You probably recognize this one. We started this launch file at the end of our workspace setup to verify that everything was working correctly.
- simulation_with_keyboard_control.launch.py
Includes
simulation.launch.pyas a child launch file and additionally starts a keyboard control node to remotely control the BlueROV.
Did we say we can remotely control the BlueROV in the simulation? Let’s try it!
$ ros2 launch fav simulation_with_keyboard_control.launch.py vehicle_name:=bluerov00
Two windows should be created. One is the familiar simulation environment. The second window is for the keyboard control.
Note
If you are experiencing any difficulties, multiple warnings and errors appear within the terminal and gazebo dies after a few seconds, you may have a problem with your wayland protocol. In this case, you need to run the following command each time before you start the simulation with gazebo:
$ export QT_QPA_PLATFORM=xcb
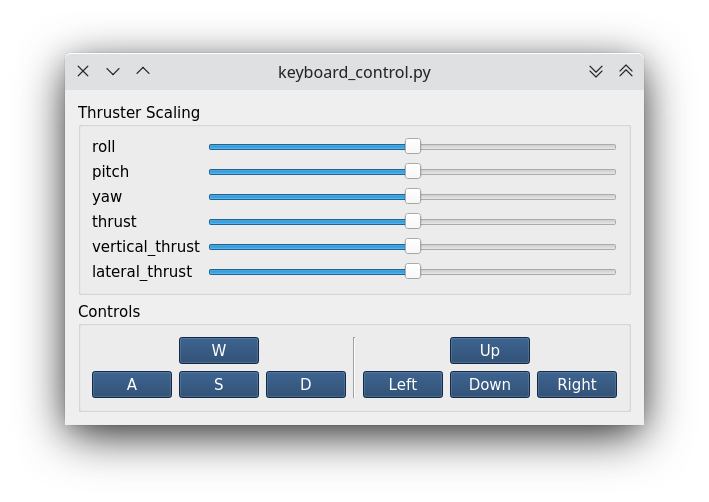
Make sure you have the keyboard control window in the foreground. Otherwise, the keyboard inputs do not get captured.
You can use the sliders to scale the thruster output for the different actuation channels to your liking.
Useful keys are W, A, S, D, J, L, I, K. Use them and find out what they are doing 🥳.
Stop everything by hitting Ctrl + C in the terminal in which you launched everything. Alternatively, just close one of the windows. This should result in everything shutting down as well.
Note
The keyboard control window reads your keyboard input. If the window is not the active one, the vehicle will not react to your input!
Hint
For assignment 0, it is not required to read the further sections. But if you like to continue, feel free to do so.