IDE Setup
For this class we recommend Visual Studio Code.
We encourage you to use the IDE/editor of your choice.
People are different and so are their needs and desires.
Person A might prefer neovim, while Person B likes CLion, whereas Person C is doing everything in windows-notepad.
Nonetheless, we think VSCode is very beginner friendly and capable at the same time.
Thus, for all of you not already having a preferred editor we present a basic setup for VSCode.
This does not mean, you could not switch to neovim later on…
What is an IDE
Simply speaking, an IDE is a more advanced text editor, with certain capabilites to simplify writing of program code. If you have experience with Matlab: the program that you have used to write your Matlab code is an example of an IDE.
Note
VSCode is probably the tool you will spent by far the most time with. You will probably have it opened all the time. You can create files and directories in it and will do all your programming in it too.
Installation
Ubuntu has snap preinstalled so probably the easiest way to install VS Code is to execute
$ sudo snap install --classic code
For more detailed instructions and alternative installation options see the VS Code Documentation.
VS Code Project Configuration
If you open a folder with VS Code you can have project specific settings stored in a .vscode directory.
The basic configuration files are the settings.json and the extensions.json.
There might be some other files present in a .vscode directory depending on the extensions installed.
We provide a basic version of both the above mentioned files.
Create the
.vscodedirectory$ mkdir ~/fav/ros2/.vscode \ && cd ~/fav/ros2/.vscode
Open an editor with the file name that we want to create
$ gedit ~/fav/ros2/.vscode/extensions.json
and paste the following content
extensions.json1{ 2 "recommendations": [ 3 // generate docstring snippets for python 4 "njpwerner.autodocstring", 5 // python language support 6 "ms-python.python", 7 "eeyore.yapf", 8 // cpp language support 9 "ms-vscode.cpptools", 10 // yaml language support 11 "redhat.vscode-yaml", 12 // ROS extension 13 "ms-iot.vscode-ros", 14 // xml language support 15 "redhat.vscode-xml", 16 // syntax support for cmake files 17 "twxs.cmake", 18 // generate doxygen comments 19 "cschlosser.doxdocgen" 20 ] 21}
Save the file with Ctrl + S and close the editor.
Repeat the steps for
settings.json$ gedit ~/fav/ros2/.vscode/settings.json
and paste the following content
settings.json1{ 2 "[python]": { 3 "editor.formatOnSaveMode": "file", 4 "editor.formatOnSave": true, 5 "editor.defaultFormatter": "eeyore.yapf", 6 }, 7 "yapf.args": ["--style", "{based_on_style: pep8, indent_width: 4, column_limit: 80}"], 8 "python.analysis.completeFunctionParens": true, 9 "clang-format.language.cpp.enable": true, 10 "autoDocstring.docstringFormat": "google", 11 "files.insertFinalNewline": false, 12 "yaml.format.enable": true, 13 "yaml.validate": true, 14 // use google style per default 15 "C_Cpp.clang_format_fallbackStyle": "Google", 16 // never fall back to tag parser 17 "C_Cpp.intelliSenseEngineFallback": "disabled", 18 "C_Cpp.codeAnalysis.clangTidy.enabled": true, 19 // use compile_commands.json specified in c_cpp_properties.json 20 "C_Cpp.codeAnalysis.clangTidy.useBuildPath": true 21 }
Again, save with Ctrl + S and close the window.
Note
In some occasions yapf does not get installed automatically by VSCode.
Better to be safe than sorry, so make sure it is installed by executing
$ sudo apt install python3-yapf
Open the Workspace
$ cd ~/fav/ros2 \
&& code .
If you followed the instructions in the previous section and created the .vscode directory and put the settings.json and extensions.json into it, you probably get a message prompt informing you that there are extension recommendations.
These recommendations are based on the extensions.json. Install the extensions:

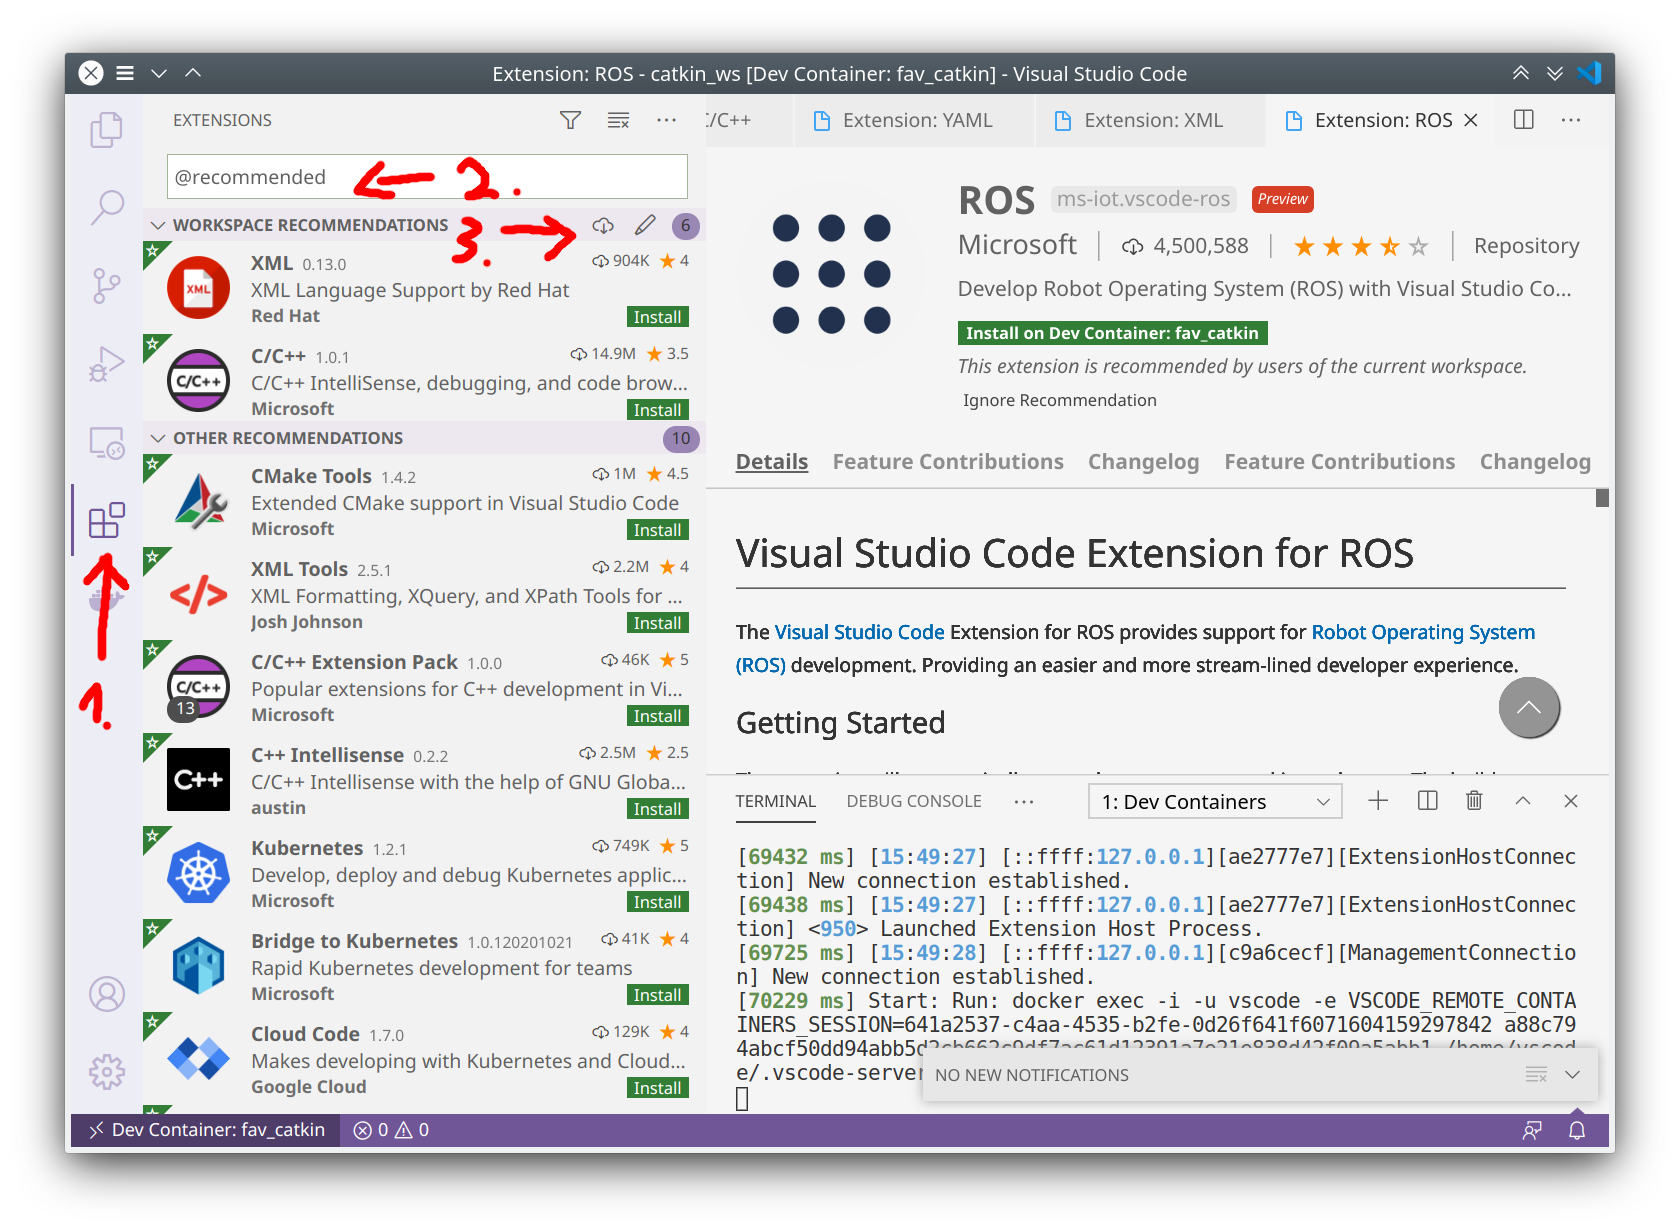
If you did not get the prompt you can install the recommendations by switching to the extensions tab, enter @recommended and hit the cloud icon in the WORKSPACE RECOMMENDATIONS section:
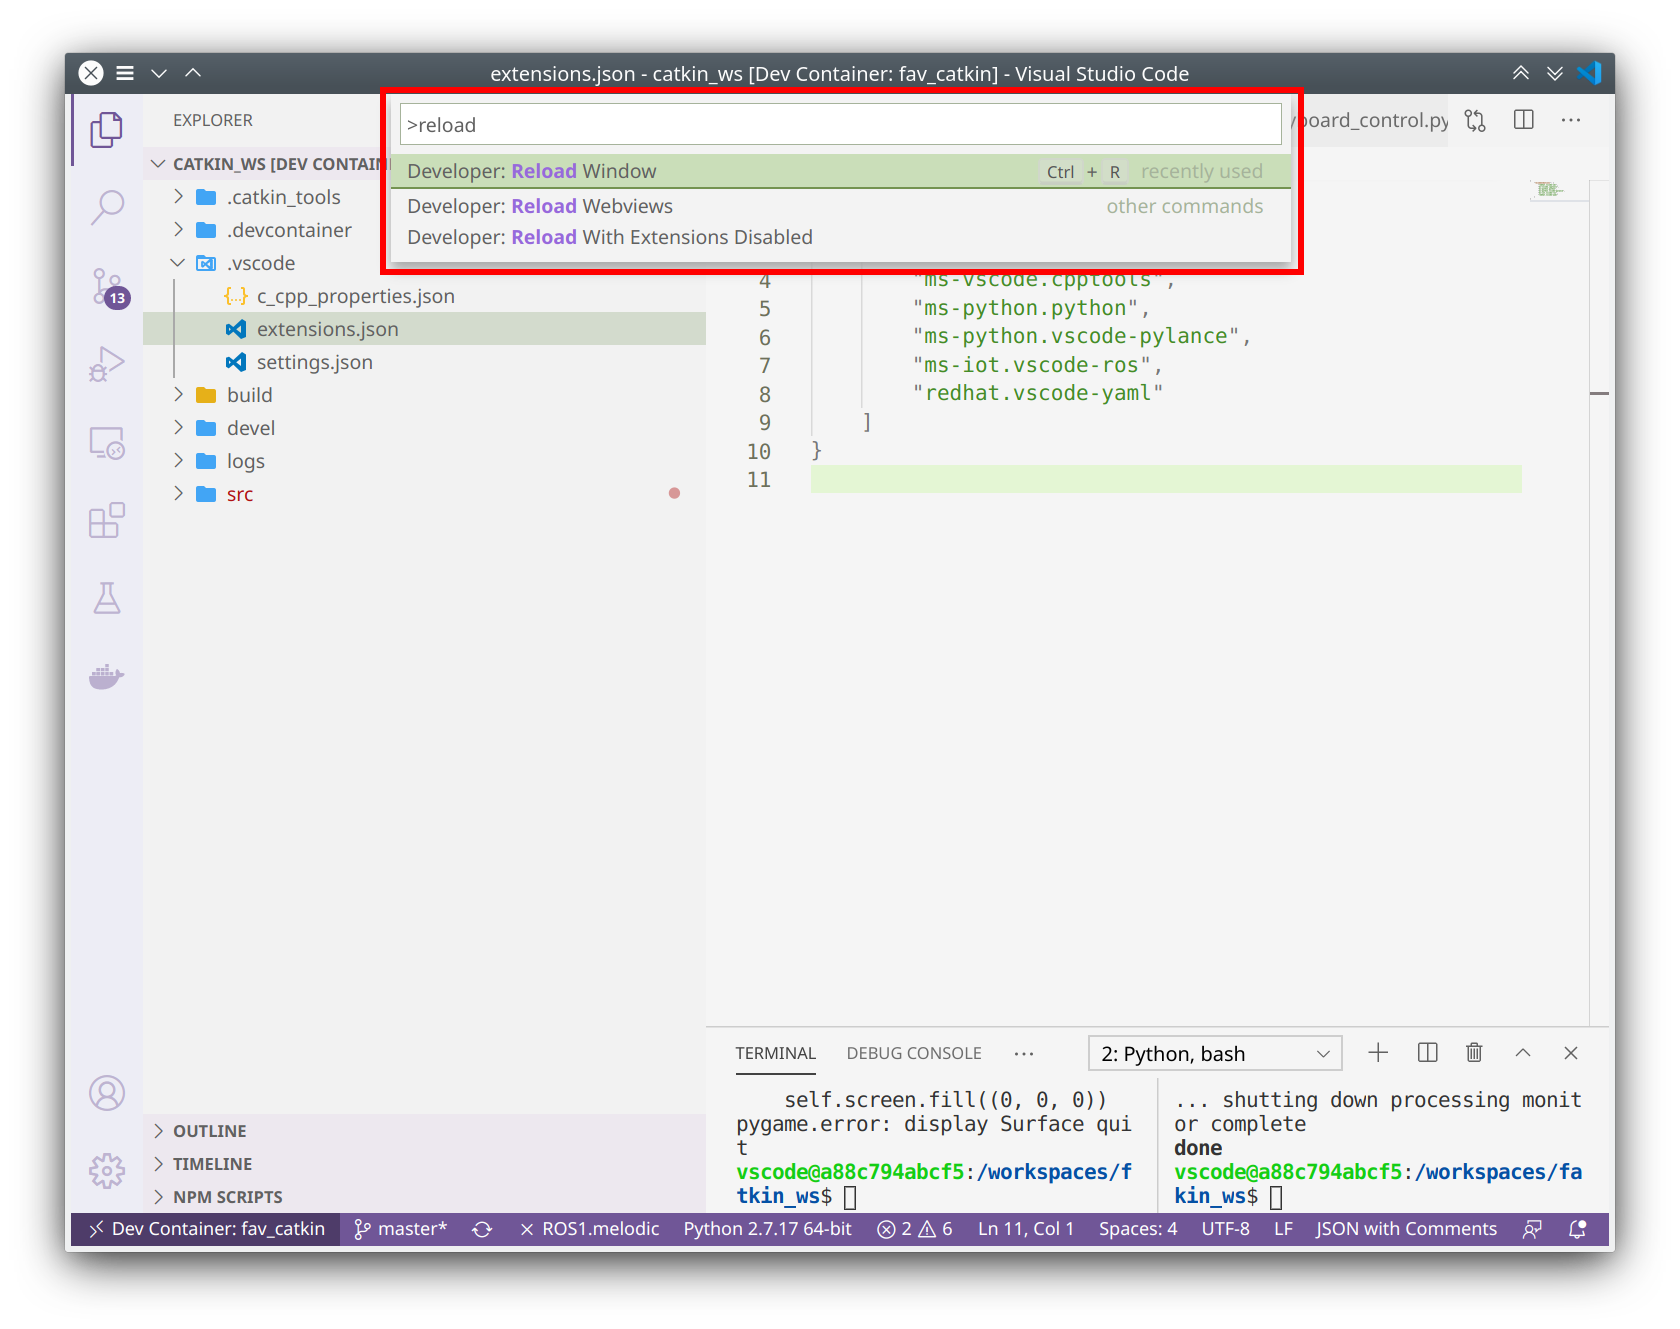
Most likely you will be asked to reload the window to apply the changes. You can also manually reload the window with Ctrl + Shift + P and enter reload:
Note
Sometimes it might not be enough to reload the window. So if you want to be super safe just restart VS Code completely.
Useful Hints
Integrated Terminal
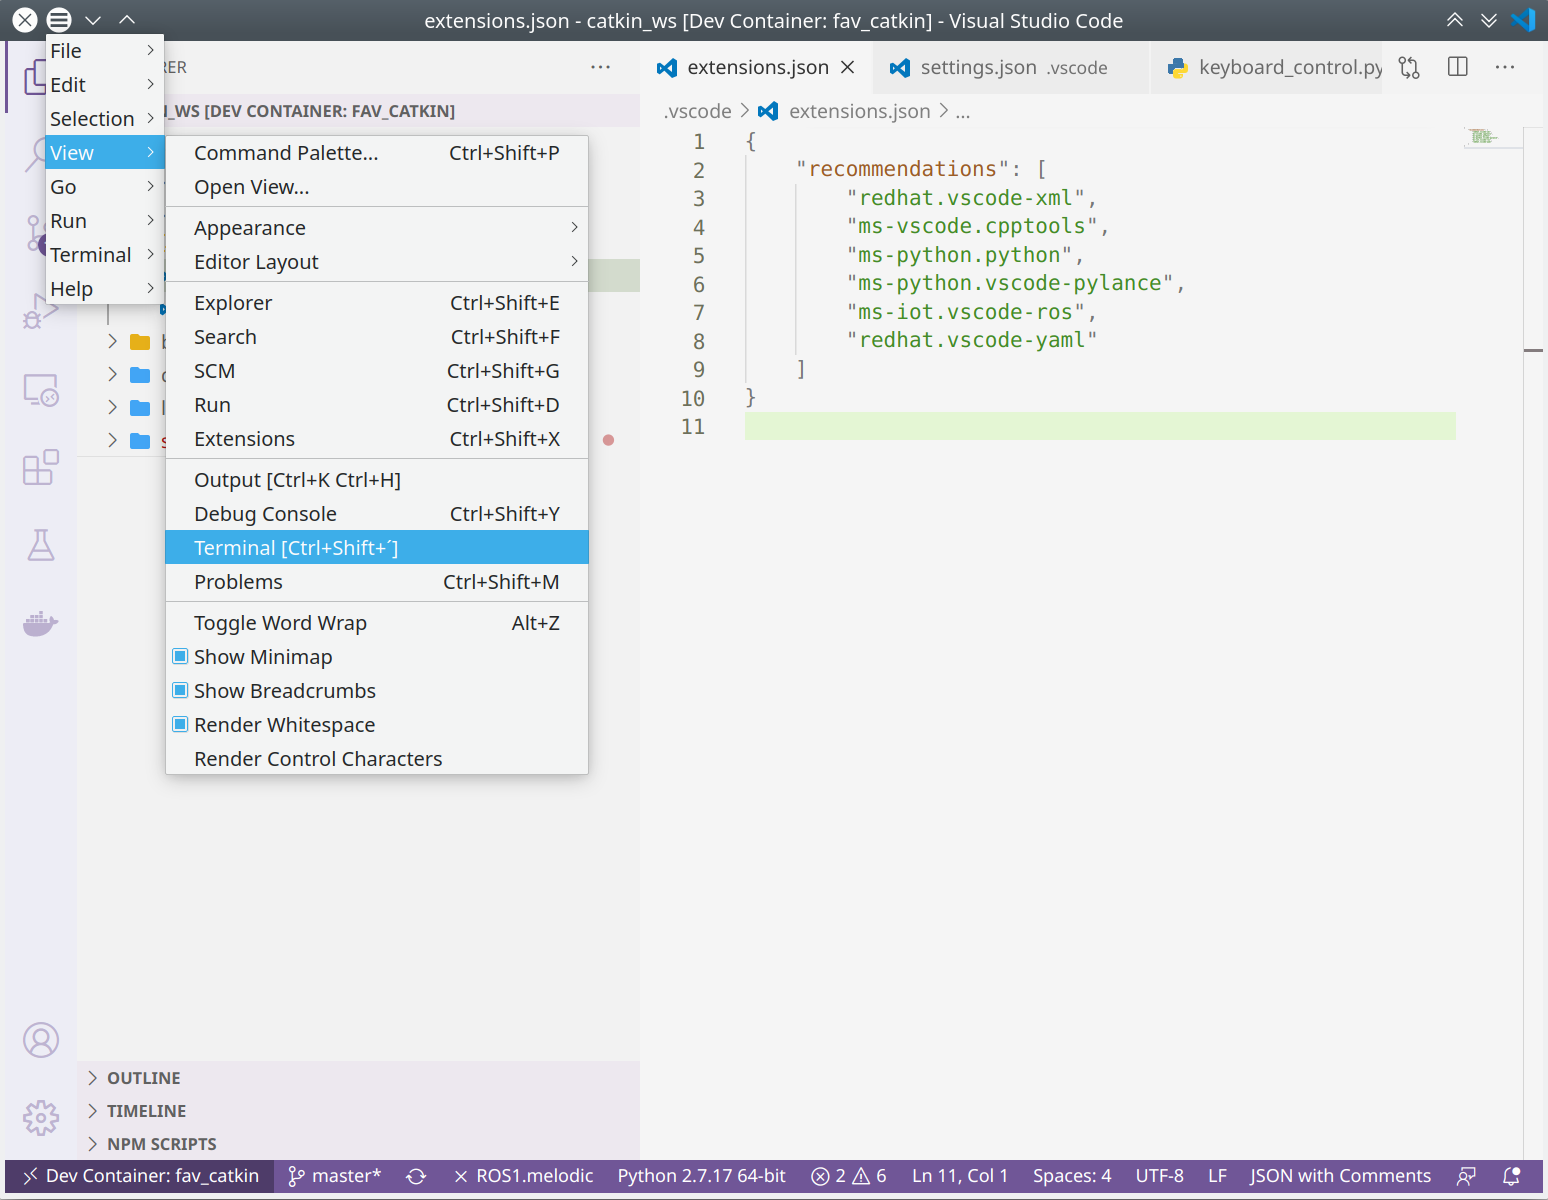
If the integrated terminal of VS Code is not visible by default you can activate it by Ctrl + Shift + ´ or via the menu bar:
The integrated terminal has two tabs that are probably of most interest for you:
The TERMINAL tab with the terminal itself, which is as you would expect a quite ordinary terminal. You can open new terminals by clicking the plus symbol and switch between the terminal via the dropdown menu. Or you can split the terminal to have multiple terminals next to each other.
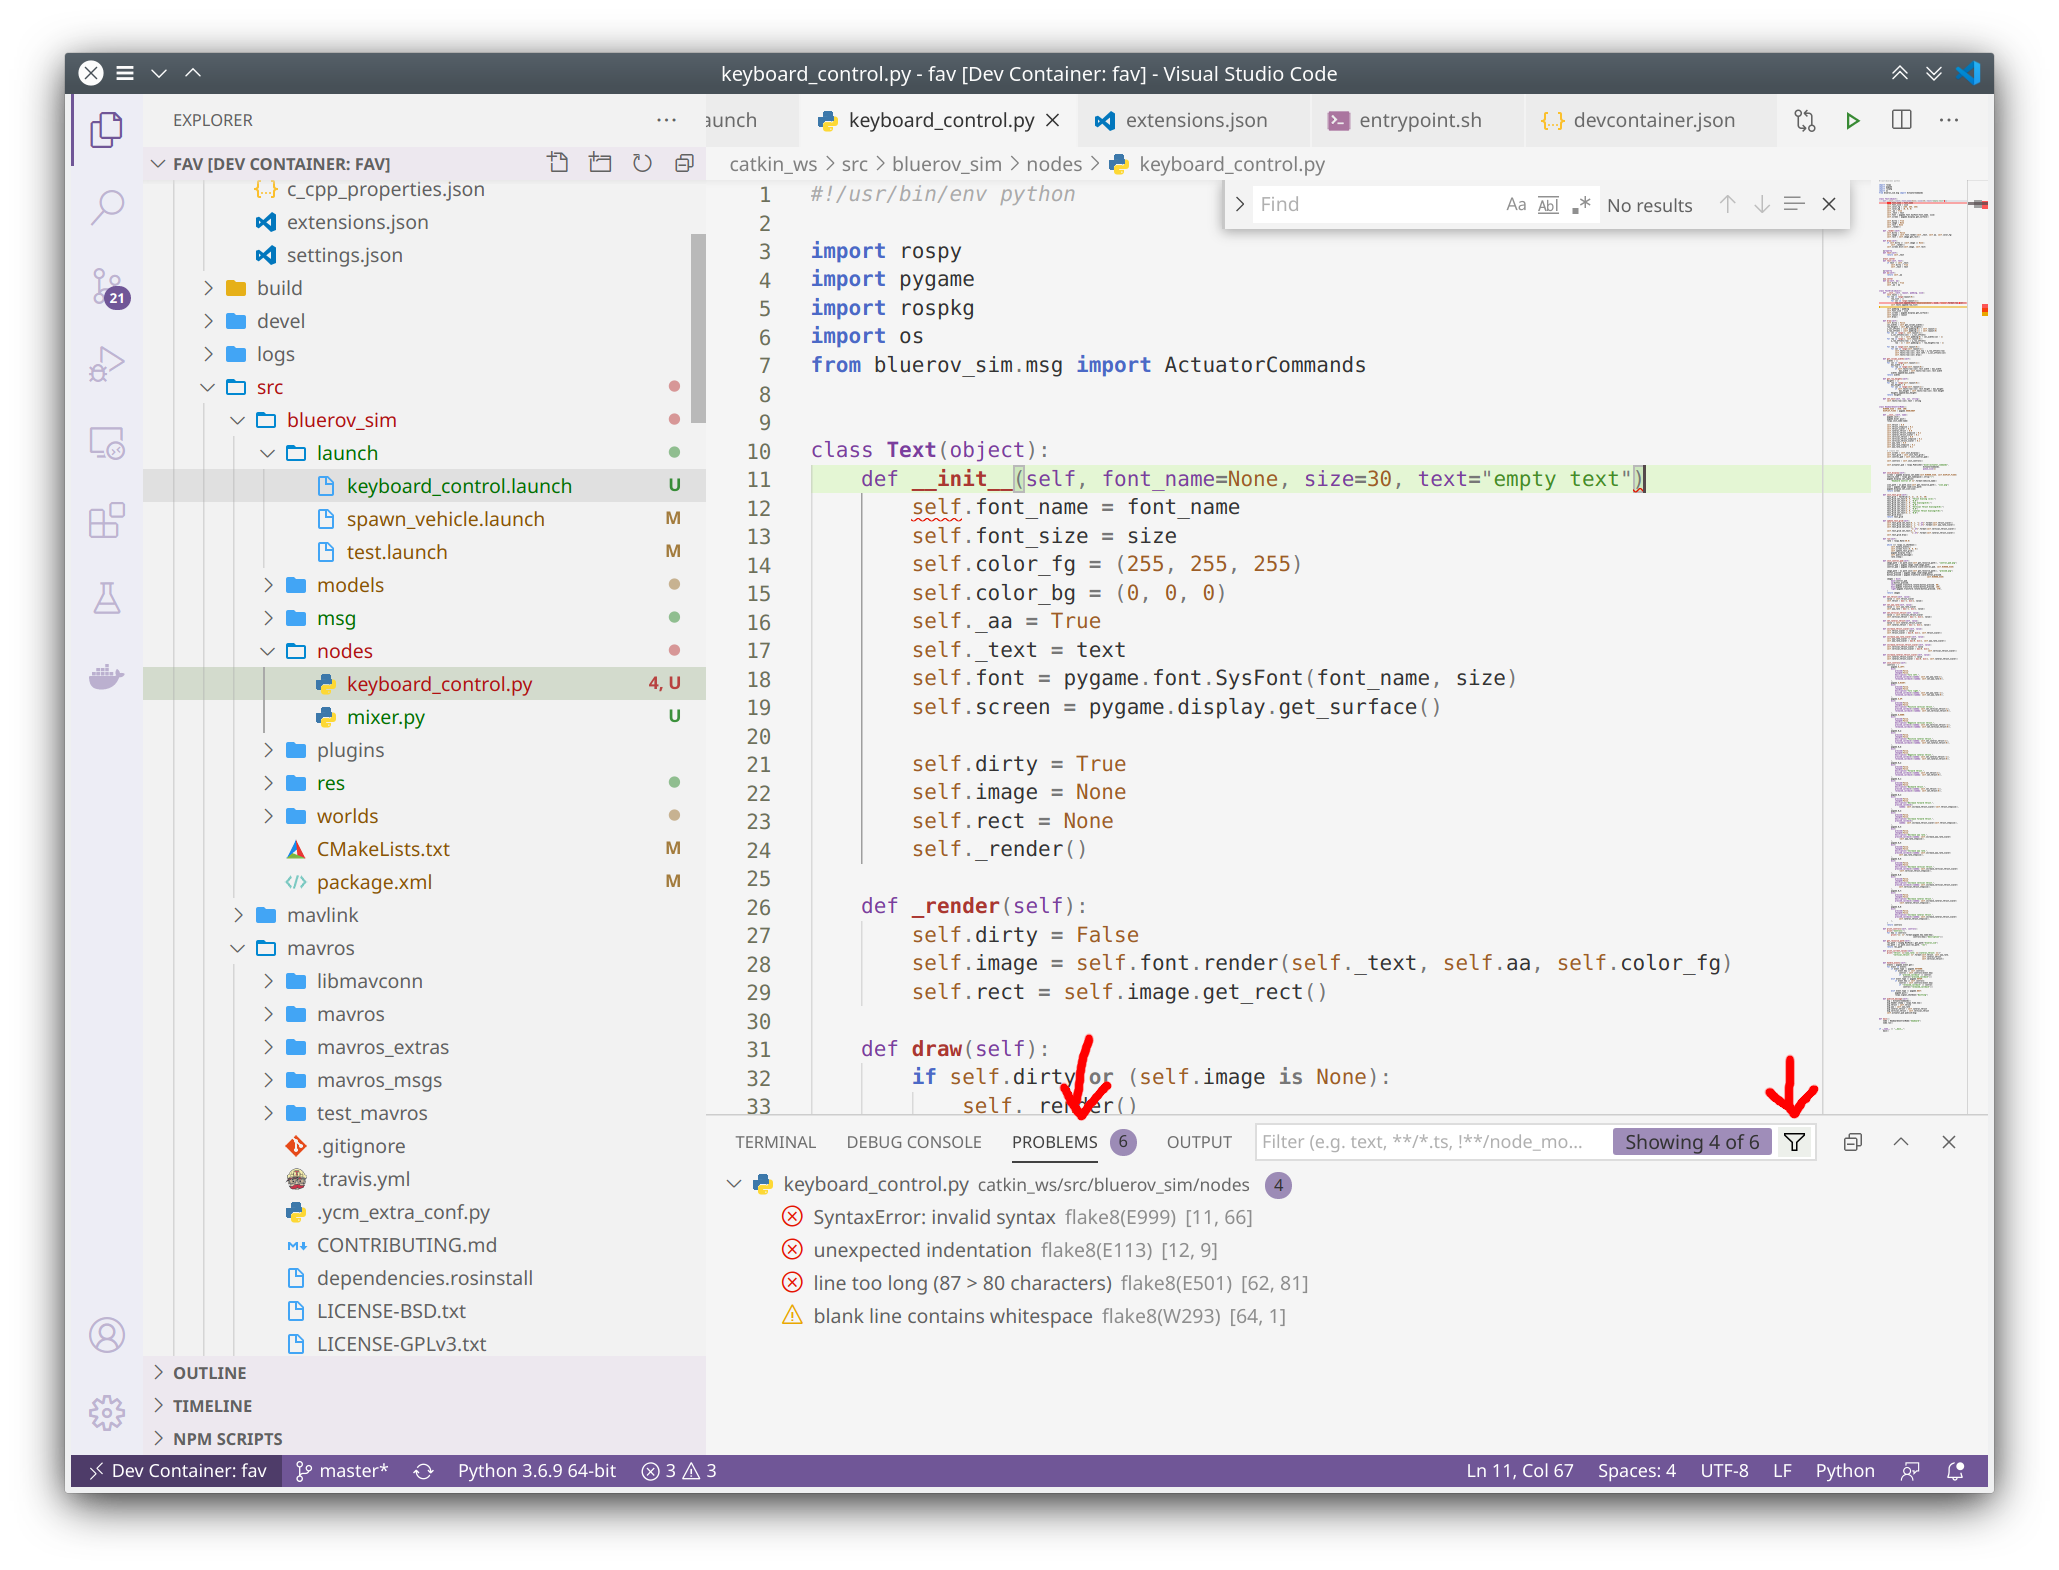
The PROBLEMS tab in which problems concerning your open source code are shown.
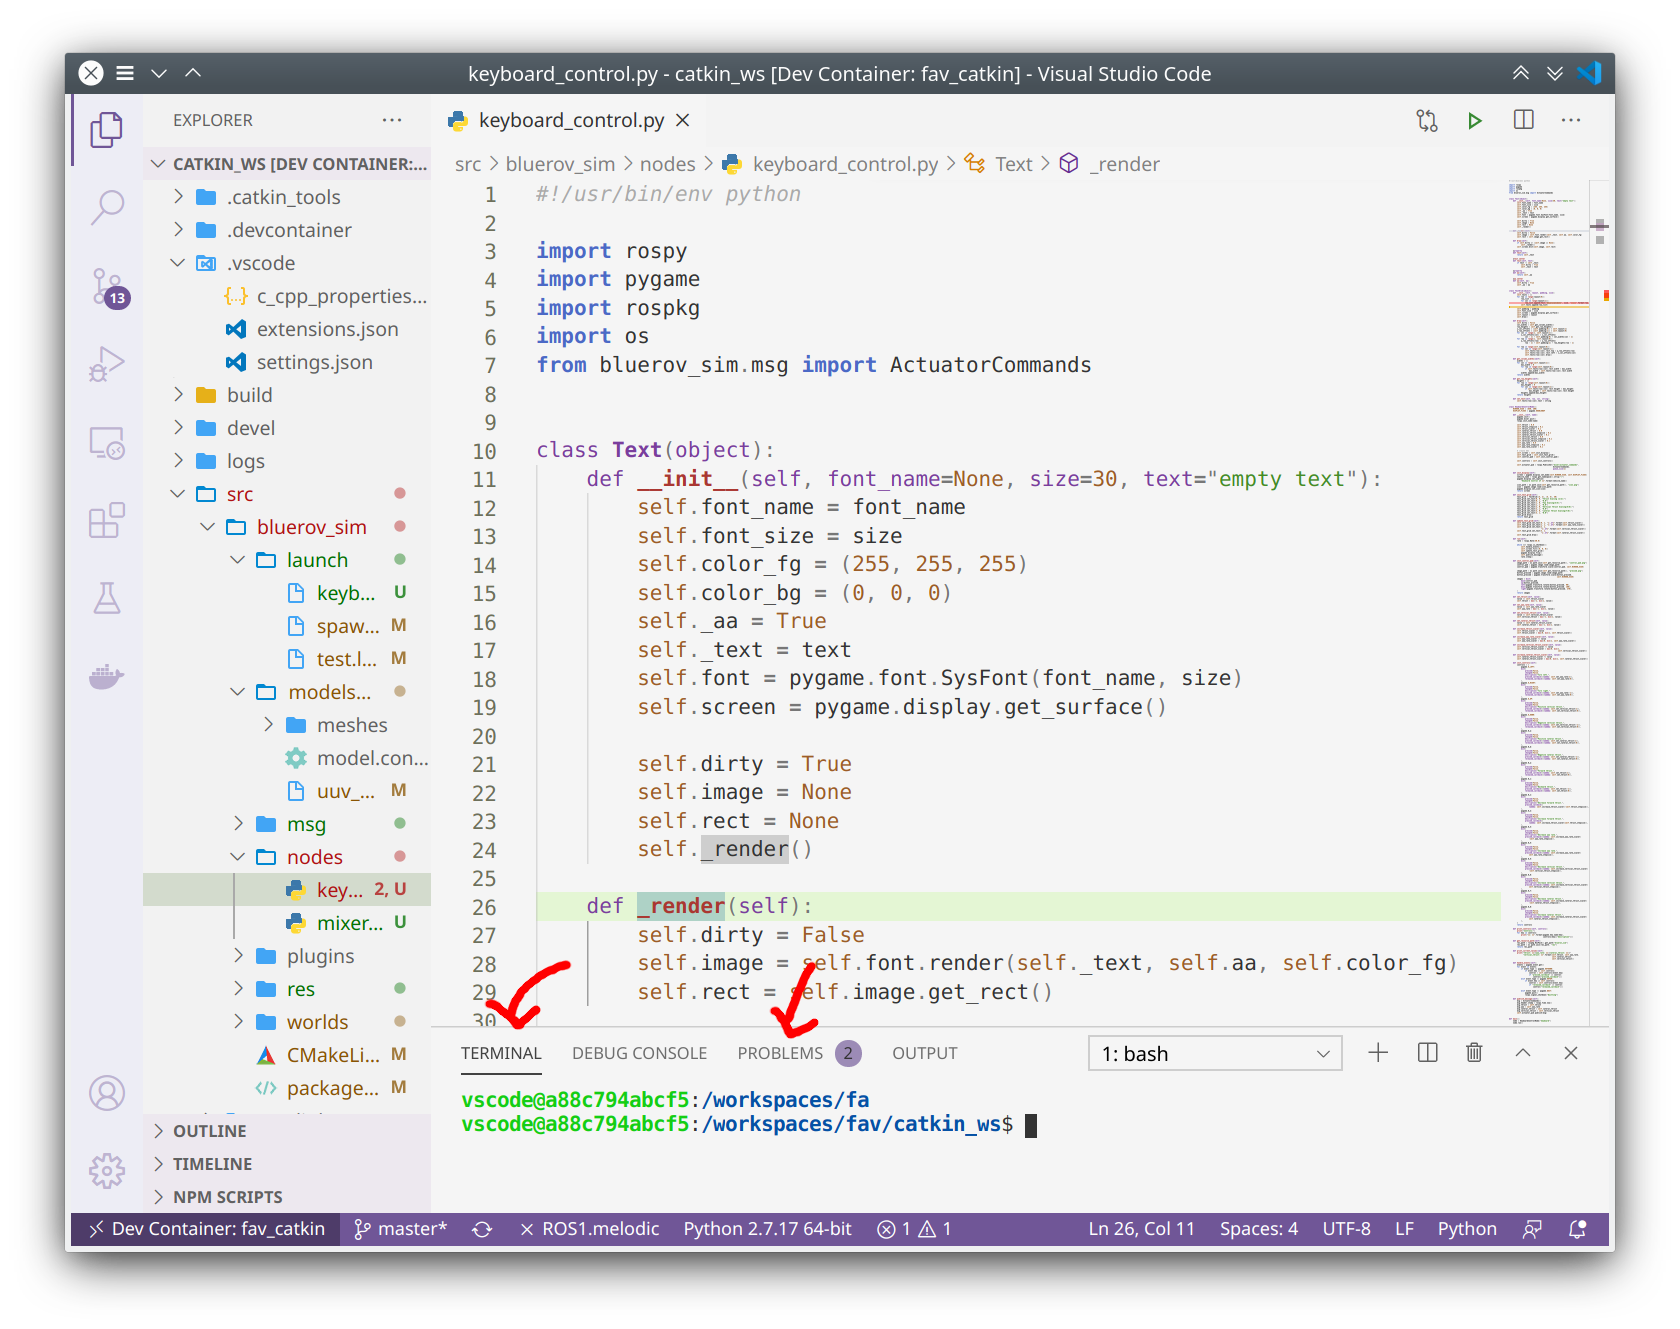
In the PROBLEMS tab you can apply a filter to only show problems for the currently active files. The following image shows problems of several kinds. For example, a syntax error due to a missing colon in line 11 or a rather cosmetic problem in line 62 that exceeds the specified line length of 80 characters.
Formatting
There are tools out there to help you keep your code neat and clean, called formatters. In the provided settings.json file a formatter has been already selected. To apply formatting on your currently active file, hit Ctrl + Shift + I.
Note
Formatting can only be applied if your code is syntactically correct.